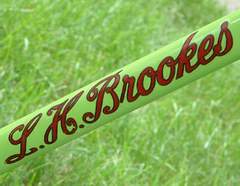
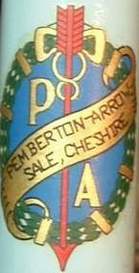
Transfer Making
Posted: Monday 21st September 2020
If there are no transfers available, it is possible to make them yourself. The best equipment is to have a scanner, a printer and a computer with some kind of drawing program. There are way to do it without these items. It is a little more difficult, needing a steady drawing hand, but I shall describe them.

You will need a copy, photograph or a reasonable facsimile of the transfer; a tracing from the frame will work also. Transfer papers should be available. They are a medium weight backing paper with a coating of flour and special binder on the transfer side.
Try professional art supply shops for the papers and also for “Gold Size” (a type of slow drying shellac used by the painters who did gold leaf lettering on bank buildings). Hobby shops are also a source. When at the hobby shop, buy the small jars of enamel thinner and enamel in the colours you need, plus 000 and 0000 paint brushes. And perhaps the clip-on enlargers for your glasses if detail work bothers you. You will need a can of clear lacquer paint and an Exacto knife.
If the computer is to be used, scan the images in and transfer them to the drawing program. Any standard typeface used by the transfer (in black only) can be typed in as separate letters and placed over the scan on a different layer. Lines, curves and arcs can be used to trace the outlines. When the detailing is complete, reverse the image. Save.
Take a sheet of the transfer paper and put two thin coats of clear lacquer on the coated side. Take a piece of ordinary paper and print the image. A laser printer is the best for this. If the image is satisfactory, cut a section from the transfer paper about 2″ wider and 2″ longer than the image. Tape this, coated side up, with clear tape over the image on the plain paper. No tape should cover where the image will be printed. Put the sample back in the printer in the same orientation as previous. Reprint. If more are required, duplicate the previous steps. I usually put a thin coat of clear lacquer to set the image.
If the computer or printer is not available, you must have a tracing available to put the image on the transfer paper. If the image transferred is in pencil, it must be gone over in India ink. A light lacquer coat can be sprayed over the images. Before doing this run a test strip of the transfer paper with a couple of India ink lines drawn and dried. Remember, the image should be in reverse! An alternate method would be to copy an India inked tracing onto the transfer paper via a copy machine. Reversed, of course. A light lacquer coating will fix the image.
Now for painting. Do the lettering and any outlining first. Stay within the lines! The background colour can be applied in relative abandon, after all the detailing is dry as it will be behind the lettering. If there is a metallic gold or silver, it is better to coat the painted area with a water borne varnish with a brush. This prevents the next coat of gold size from attacking the medium holding the metallics.
After all is dry, cut the image with a 2 mm border. Apply the gold size to the entire painted image. If the image is individual letters, Take an Exacto knife and score, not cut through, around each letter. Paint with the water borne varnish and the gold size within the scored lines.

Application: Clean the area where the transfer will be placed. Place masking tape bands around tubes and mark lines in pen to aid placement. After coating the transfers with gold size, they must be set aside to get tacky. Usually an hour or two. (Read the label). When it has become tacky, Do a sample to finger test on scrap. Place the transfer in position and wrap masking tape tightly around the tube, covering the entire image. Rub the tape to get the image into intimate contact with tube, also expelling air bubbles. Leave undisturbed for a day or more. Remove masking tape, it will tear the transfer backing paper, but make sure the image is not coming with it. Take a sponge full of water and apply to the transfer paper. Several times until with slight thumb pressure, the backing paper becomes loose. Wet some more until it slides away completely. Dab with a lint free cloth to remove the water. No clear coating is necessary, it is already there.
A third choice is to take an image of lettering you need to a sign maker. The kind who can supply cut lettering in a thin adhesive backed vinyl. This is only good for lettering without a border but many colours are available. If you are lucky, you can find a shop that does thermal imaging. There they can duplicate a multicolor transfer if provided with flat artwork.
Posted: Monday 21st September 2020
Upcoming Events
Whether you are looking for a gentle social meet up, or a 100-mile ride browse the community’s upcoming events and plan your next weekend outing.
