Sturmey-Archer 4-speed hub maintenance
Posted: Monday 21st September 2020
The four-speed Sturmey-Archer hubs have a bit of a reputation amongst owners for being fussy about getting them into correct adjustment and their ability to stay that way. With proper assembly and maintenance they are perfectly serviceable and should give no trouble; most problems seem to arise when a hub/cable/trigger has been newly installed or repaired. Primarily intended as a follow-up to preceding advice on four speed hubs, much of the following can be applied to three speed hubs and their associated controls.
A few minutes once a month for a check over and a drop or two of oil are usually all that is needed once a correct installation has been achieved. I reiterate previous advice from other contributors on engagement of the lowest gear. A light forward rotation of the pedals is essential; freewheeling will not do! In fact this a good procedure for all gear changes, up or down the ‘box, on any hub gear.
It is not unusual for these four speed hubs to rattle a little whilst in use, particularly in normal gear. This is caused by the internals being free to shake about within their generous tolerances, and is much more noticeable on hubs with an alloy shell. The FM and FC are the worst offenders, having more moving parts than the FW. The FG does not exhibit this trait although if allowed to run dry the noise from the low-gear pawls will alert the rider to the need for oil. Obviously if there are any overtly suspicious noises emanating from any hub an immediate inspection is essential.
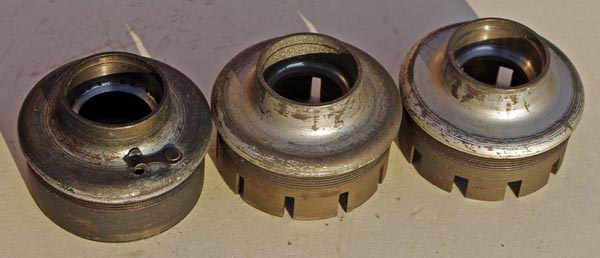
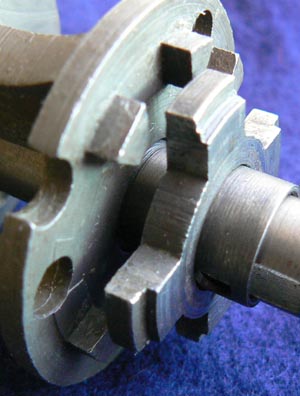
The one on the left is the early type with enclosed low gear ratchet, which was replaced around 1951/2 with firstly the one in the centre with narrow slots then the wider-slotted type on the right. Under duress the latter two types can break a “finger” off their ratchets leaving a piece of metal free to jam the works, usually doing a fair bit of damage in the process. Anyone acquiring a secondhand hub would be wise to take a look inside to see if there is a piece of ratchet missing. Even if fragments have been removed from the hub, the gap in the ratchet can give rise to more trouble, and the cup should be replaced before use, preferably with the early type. Unfortunately these are in rather short supply these days!
The subject of triggers has been broached by other contributors so I will not dwell upon the matter any longer than it takes to impress upon the reader that suitable location and correct functioning are of prime importance. They are intended to be fitted to a straight length of 7/8″ handlebar which rarely seems to happen. The clip will just accommodate a 15/16″ diameter tube, but it should be noted that fitting triggers on a curved section will give rise to distortion, particularly if the clip is tightened fiercely!
In addition to a sweetly operating trigger it is desirable to ensure that the cable is in good order. I have seen the operation of many hub gears impaired by a shabby or badly-run cable. The inner and outer must be free from kinks and the run of the outer must have no sharp bends. A “spongy” outer will play havoc with gear selection and should be replaced. Similarly, a frayed inner is neither use nor ornament. Good lubrication is important; uncouple the inner and pull it through the outer to expose the portion of inner cable which is normally hidden, then oil copiously and work the inner through the outer a number of times before reassembly. Often overlooked is the pulley over which the inner cable passes; ensure that it is free to rotate and give it a spot of oil. A bent or twisted toggle chain must be attended to. Time spent on these details will not be wasted.
Correct cable adjustment is vital and the four speed hubs tend to require more frequent attention in this respect. With the trigger in No 3 (N) position, the scribed line on the indicator rod should coincide with the left end of the axle. Moving the trigger into No 2 (L) position should cause the end of the indicator rod to be flush with the end of the axle. A little rotation of the pedals will help to engage the mechanism fully during this operation. Note that there are two axle lengths for these hubs therefore two lengths of left side indicator rod. Secondhand hubs are sometimes fitted with the wrong one! The two-piece indicator assembly has a tendency to come unscrewed and should be checked regularly. The threaded portion is very slender and must be treated with respect. Beware – overtightening will cause breakage rendering both rods unserviceable.
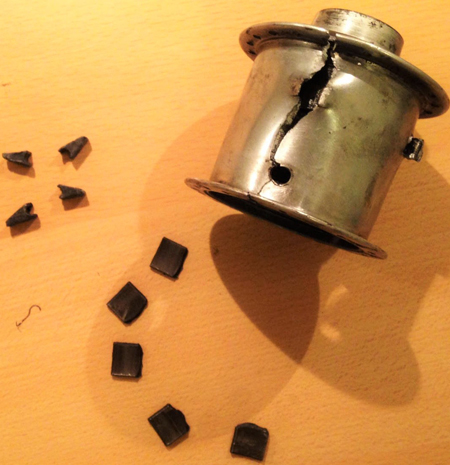
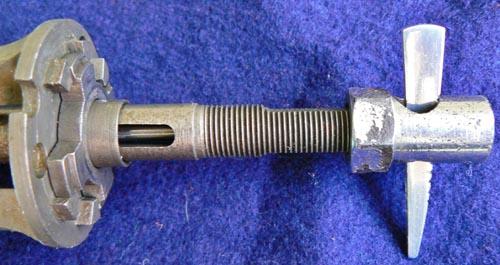
With all four speed hubs there is a possibility of the indicator assembly coming apart, often initiated by a partial unscrewing. The considerable pressure placed on the operating system when changing into the lowest gear is certainly a contributing factor. A sudden problem with gear selection is often a sign of the rods coming undone and should be looked into without delay. Internal spring pressure will cause the left-side indicator rod to shoot into the hedgerow like an arrow and from personal experience I can assure readers that they are not the easiest things to find. If it can be recovered it may not be any use trying to screw it back together as its threads are likely to be be ruined, likewise those of the mating part. It may, however, be of some use in getting the machine home, see figure 4 below.
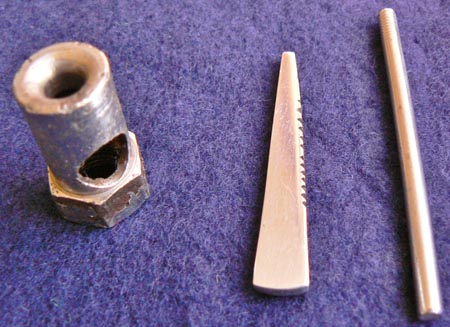
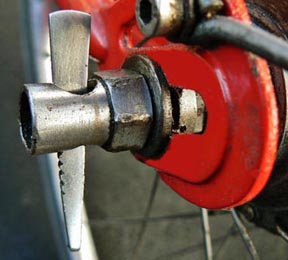
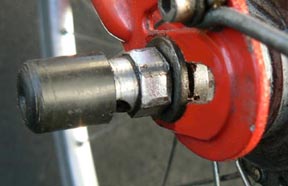
If the rods do part company, these four speed hubs settle into a neutral position, owing to the compensating spring becoming unleashed (fig. 3) and unless some action is taken the hapless cyclist is faced with a walk home. To deal with this situation I have devised a small two-piece kit to fix the hub into gear and make the machine rideable. The kit has the advantages of being easily portable, quick to deploy and can be made in ten minutes at no cost! Further satisfaction may be had from knowing that with a properly maintained hub you will probably never need it. I should stress the fact that this is a temporary measure only and that a full and proper repair should be undertaken as soon as possible! I carry one of these kits on all three of my machines equipped with FG/ FW hubs, although in over thirty years of using four speed hubs I have only had one instance of the rods coming apart, which was entirely my fault for not tightening them up after a stripdown.
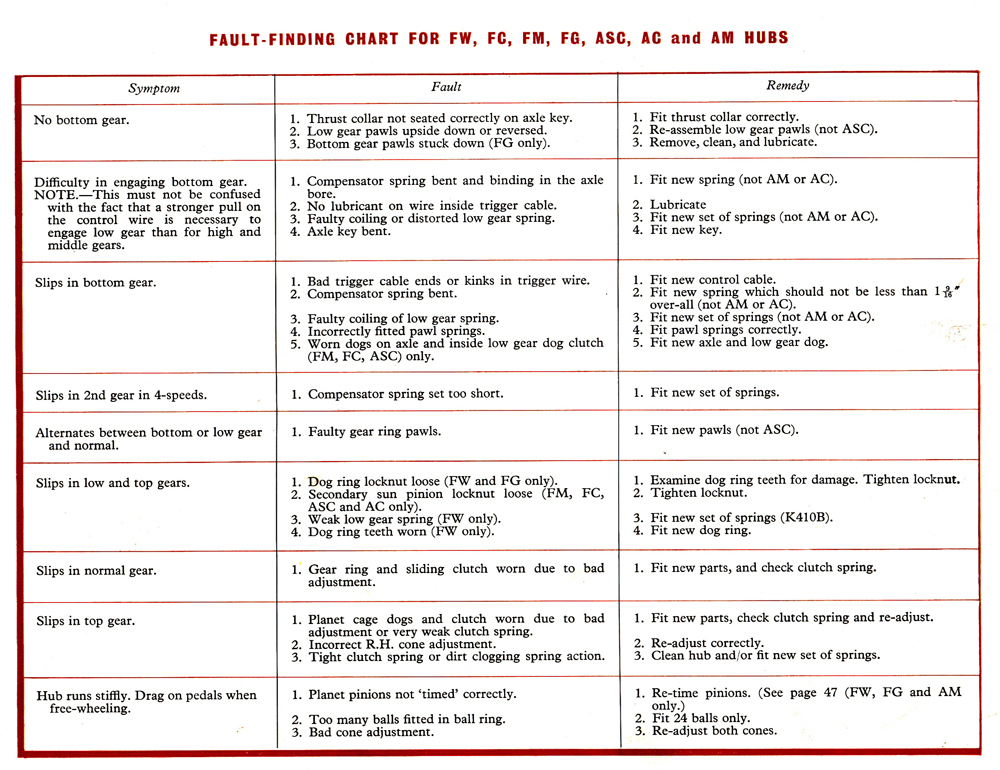

Here are two fault-finding pages on four-speed hubs.
For the adventurous types who would like to try do-it-yourself repairs, I can supply a set of drawings and instructions for any Sturmey-Archer hub up to 1985, and I am happy to send them off by request by email ONLY. Address is: mr.rb.ok(at)googlemail.com substitute ‘short at’ for (at).
Posted: Monday 21st September 2020
This article appears in the following categories.
Upcoming Events
Whether you are looking for a gentle social meet up, or a 100-mile ride browse the community’s upcoming events and plan your next weekend outing.