Hints and Tips (2)
Posted: Monday 21st September 2020
If you need to fashion a bottom-bracket shell inner liner it is possible to use plastic. It may need to be 38 – 42mm wide to fit snugly between the bearing cups. After the usual search of the cycle shed I realised that the discarded red plastic cap from the top of a WD40 or GT80 aerosol would do the job. A Stanley knife started the cut to remove the flat top and I was able to do the rest with scissors, including a nick for the grease nipple. The diameter was too great so I reduced this until it was just right for the shell – this left enough ‘spring’ for it to locate snugly between the cups. I have found on restored frames that grit, etc. from the sand-blasting can fall down the tubes into the grease on the balls and create a gritty sound, hence the need for a liner. This nearly always happens if you hammer cotter pins in and suddenly your smooth cranks sound like a grinding machine.
Do others, like me, spend too much time polishing up old alloy components for use on their machines? I don’t have much in the way of workshop facilities and so do not have a buffing machine. I use Scotchbrite (a type of fine scouring material) followed by ‘Astonish’ which is compound for cleaning ovens, hobs (not ‘of Barbican’!), etc., then Autosol and Brasso. After several hours of this I sometimes think that maybe stamp collecting would not be such a bad idea after all.
When building up a machine and it comes to setting up brakes, try doing it with the wheels in situ but minus tyres. It is much easier to see exactly where the brake blocks will contact the rims when applied.
Several of my derailleur-geared machines have spacers behind the freewheel block as it is often difficult to adjust the gear to ride comfortably on the big sprocket without pinging on the spokes. I use Sturmey Archer spacing washers and I have also seen these washers used on modern bikes with unit BB to give just a little extra clearance for the inner ring on the chainset and to save scrapes on the chainstays. I don’t know if these spacers are still made today but if you are discarding a defunct SA it is worth saving the washer behind or in front of the sprocket, which is used as a simple and cunning aid to chain alignment. The same washer can be used behind a sprocket to fine-tune the chainline on a fixed-wheel set up. This, used in conjunction with the shoulder on one side of the sprocket, gives some scope for alignment.
As is always the case, when I was fitting the Chater chainset to the Bates the chainring waved from side to side as I spun it. Why, I wondered, do I always get the warped sets? It seems that I am not the only one as, at the Whitchurch ride lunch stop, I heard David Palk explaining to someone how to cure this – he remarked that he had to do it with every Chater chainset he fitted. To think I always thought that Chater were supposed to be an example of British engineering at its best. David explained that the makeshift tool needed is a very large adjustable spanner plus an old toestrap fitted to the jaws to protect the chrome. Fit the chainset minus ring to the BB axle in the frame.
If you have a two arm set then the crank fitting obviously has to be the datum point, if not you can choose whichever one of the three arms you think will give you the best chain line. David sticks Bluetack on the chainstay as a datum mark. He then tweaks the other two arms using the spanner to align them until they line up with the blue tack. When satisfied with this he fits the ring and re-uses the Bluetack (would David do anything else!) to mark the chainstay distance to the ring which is then tweaked in the same way.
I had a phone call recently from Peter Nowell of Liverpool and the conversation got round to Chater chainsets and my attempts to make them run true. It was pointed out that when cranks are re-chromed sometimes the diameter of the axle hole is altered slightly (how I wonder) and makes for a slightly sloppy fit on the axle. When the cotter pin is tightened this causes the chainset to tilt to one side, hence to out-of-true running – back to the drawing board then.
I seem to spend a lot of time juggling with bottom-bracket axles. I decided to upgrade my Flying Scot which had a single Brampton chainset to a double Stronglight/TA cottered set up: this has the cranks with the smaller oval logo. I have a very crude way of measuring axles from the inner bearing edge to the outside edge of the crank. I had a note that the Ephgrave with Durax double chainset was 32/36. Checking the existing axle showed it to be 32/34 so I tried 32/36. This nearly worked except that bolts on the inside of the chainring just caught the chainstay. Out with the axle and I eventually found a 34/38 which seemed to do the trick. What I can’t understand is that when I was building bikes in the 50s there were two axles, ‘normal’ and ‘chaincase clearance’ and I wonder when all of these variations came into play.
John Spooner owned a cycle shop and also built his own frames. He is a fount of knowledge on all things lightweight. He explained that as a general rule BB axle BW (Baylis Wiley) 14 is for double and BW 15 for single chainsets. When I got home I looked in the BB box and found a BW23!! I did read, in a Cycling from the late forties, an enquiry asking what length axle to use for these new-fangled double chainsets – the answer from Chater Lea was to use a tandem axle!
This all reminded me that some years ago I was struggling to find an axle of the right length for my road/path Ephgrave which was on fixed, the problem being that the Chater chainset was just a bit too far out for ideal chain alignment. Someone suggested, ‘put the axle in the other way round’ which I did and never had trouble again (it was 32/34) but I guess my left pedal is 2mm too far out!.
I often comment on about the shortage of materials available to builders right through from the end of WW2 to the early 50’s. I feel that this is one of the reasons for frames, etc of this period not always being to quite the expected specification. In this respect I understood that there had been a shortage of suitable lugs at this time, and that some builders were probably using pre-war lugs which would not be of the desired angle. The fashion for angles had, in the main, got a degree or so steeper. I had been told that these builders placed strong sections of tubing into the lugs and forced them to the angle they wanted. I was therefore interested to find the following paragraph in the introduction to the Carpenter catalogue, 1949/50: “All frames are jig built, ensuring absolute accuracy. Tubes are mitred and pinned into special angled lugs, properly filed and lightened. We have lugs of all angles, and do not resort to the dangerous practice of lug pulling.”
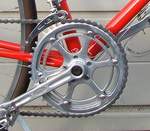
Some 5-pin chainwheels take a converter between the cranks and the rings. The outer bolt holes are 6-pin. Read carefully, I shall only write this once! To look correct the 6-pin arms have to be dissected equally by the crank. If you are one bolt out when fixing the 5-pin converter then the crank ends up close to one of the 6-pin arms and much further away from the other. Hard to explain in writing but obvious to others if you get it wrong.
Honestly, I did it just for the photograph!! If you don’t get it right then an email from AVT will soon be on its way to point out the error of your ways.
GB Superhood levers – have you puzzled how to get those lever pivots out? On the earlier pre-Superhood models there is a rod, threaded at one end with a screwdriver slot at the other so it is obvious. Hilary Stone told me the secret (or it was until now!). The pivot has a half-round recess in the middle and this is located by the bolt which tightens the clamps on the bars. Remove this bolt and the pivot slips out.
Posted: Monday 21st September 2020
This article appears in the following categories.
Upcoming Events
Whether you are looking for a gentle social meet up, or a 100-mile ride browse the community’s upcoming events and plan your next weekend outing.