
Drillium - From racing craze to bicycle artwork (Part 1)
Posted: Sunday 16th August 2020
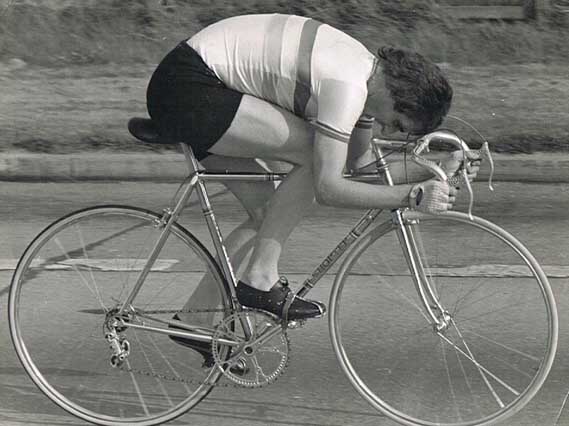
Mention ‘drilling’ to most people here in relation to older bikes and they wil start talking about Alf Engers who was a star time triallist in the UK from 1954 to 1984. Alf was famous for a period when he drilled just about everything on his bike bar the frame, and even this had the rear and fork ends drilled. The drilling done at this time was to lighten the bike as weight, or loss of it, was considered the most important feature of a time-trial bike. The drilling was soon dropped as Alf concentrated on aerodynamics with tricks such as mounting the brake levers behind the bars and the stirrups behind the forks.
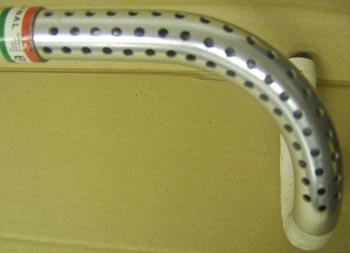
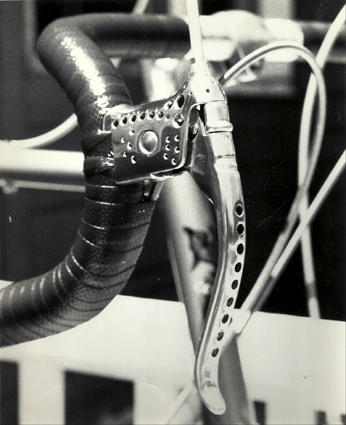
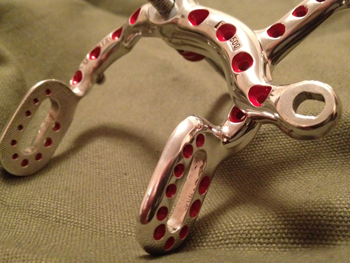
Drilling however was carried out much earlier, Mick Butler sent us this image; and explains: “Drilium is nothing new, the French were doing it way back before the First World War; here is a picture of a Drillium brake lever that was used on my Dad’s Leon Meredith Bastide track iron. Original nickel plating and just marked Depose.
When I raced at Gosling back in the 1960’s and 70’s he gave this to me so that I could ride my track bike over to Welwyn and be road legal. I just had to undo the handlebar clamp quickly and the front brake bolt so the whole brake ensemble came off together for me to ride on the track. I have never seen another lever like it, I guess it dates from the early 1920’s as the Meridith Bastide was this vintage”.
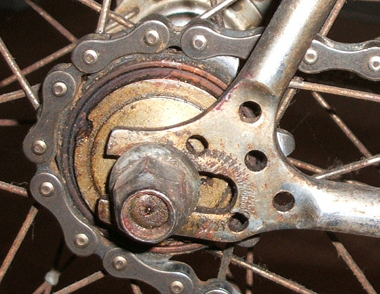
During our recent visit to Italy for L’Eroica Patricia and I also saw this on an early-Italian Gerbi track frame with inch-pitch transmission:
The bottom hole really weakens the rear end being so close to the edges. I guess the bolt gripping on the upper surface saved the day.
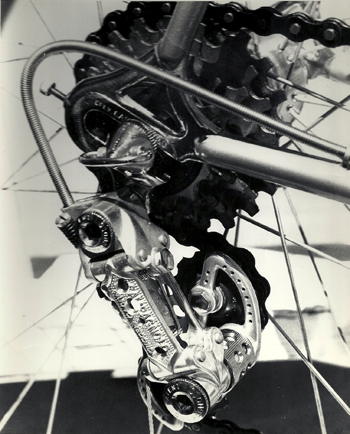
Another exponent of drilling was Eddie Merckx of course who, like Alf went through a period of drilling for lightness.
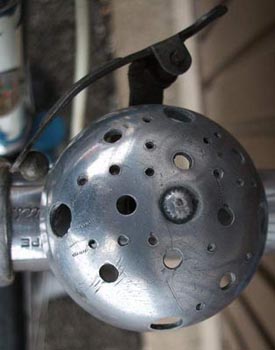
However, moving forward some twenty-five years and drilling has gone from a lightening, speed inducing exercise to becoming an art form to ‘bling up’ a bike or component to make it stand out from other similar pieces. Drilling looks straight forward enough but on a bike it is often on curved or rounded surfaces making it extremely hard to get a symetrical look to the finished article. I have an alloy bell drilled by hand in the 50s and as you can see from the image below – the job looks far from professional (sorry Ralph)

I read your interesting feature on drilled cycle comonents, as a school kid in the 70’s and very impressionable I ruined plenty of good components (one or two I still have) by attacking them with various drilling machines, I remember an interesting article in Cycling by some forward thinking guy that drilling was counter productive as all the holes would cause air turbulance and slow the rider down,. I think the article concluded that more weight could be saved by having a few less sips of tea before the start. We do see it of Engers who went from holes in everything to cutting bits off components e.g. bottoms of brake caliper slots, and smoothing all the name and notches off Campag gear levers theoretically to improve aerodynamics.
More images of Drillium here – if you have images of interesting drilling, please send to webmaster for consideration of inclusion. Please don’t submit images unless you have permission of the owner/photographer.
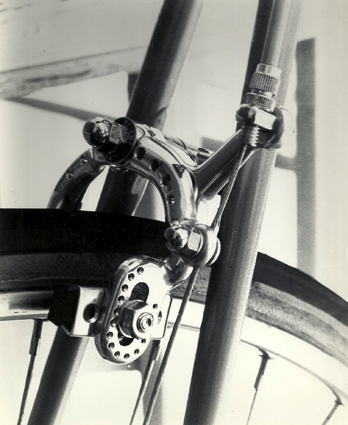
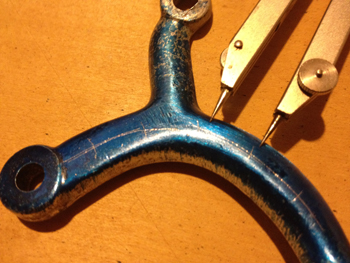
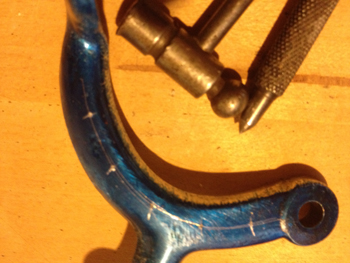
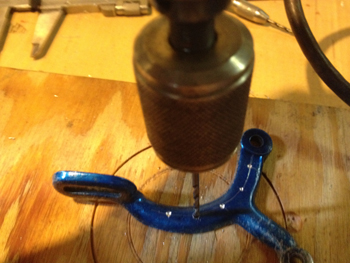
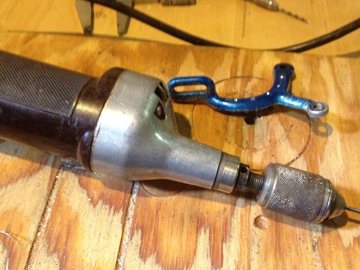
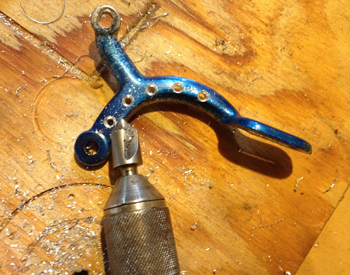
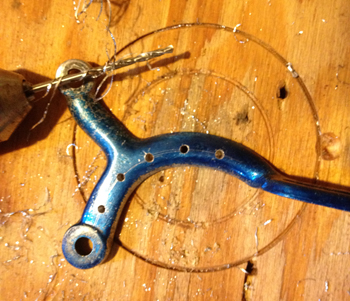
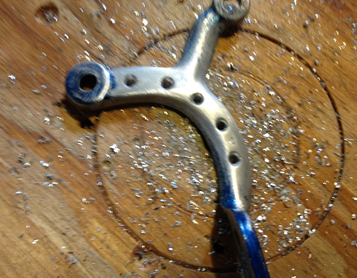
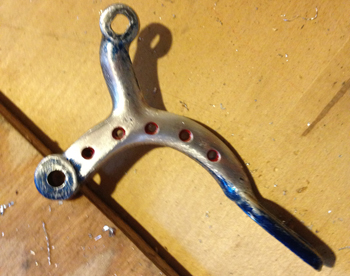
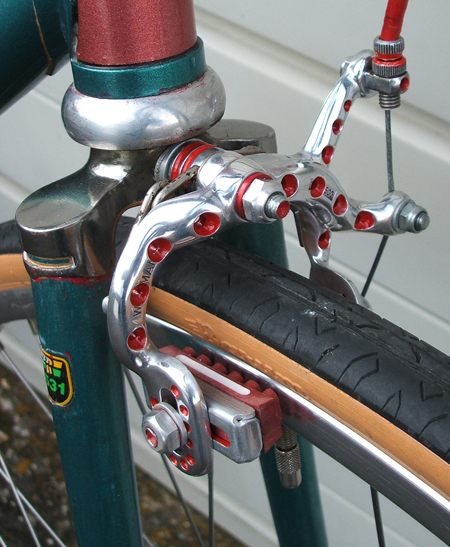
As far as drillium is concerned, in a short couple of sentences: the brakes were done by eye because of the irregular surfaces. The hole pattern is laid out with machinist blueing and then centerpunched, dimensions are checked mechanically with dividers or calipers. I then take a pin vise and lightly start a hole. If the hole needs to be moved, I can angle the pin vise to correct the hole location. I then use a drill press to drill a through hole. If I centrebore it with a ball end cutter, I make a small post which the hole in the part goes over, this then lines up the cutter with the centerline of the hole.
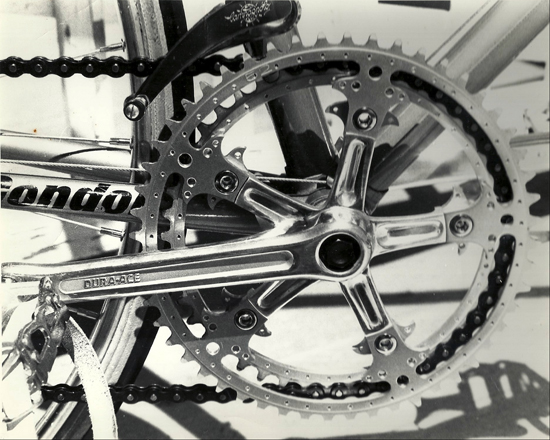
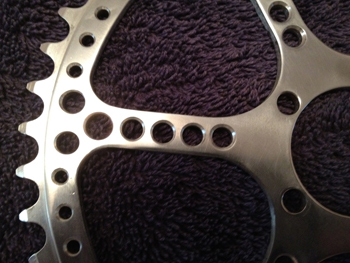
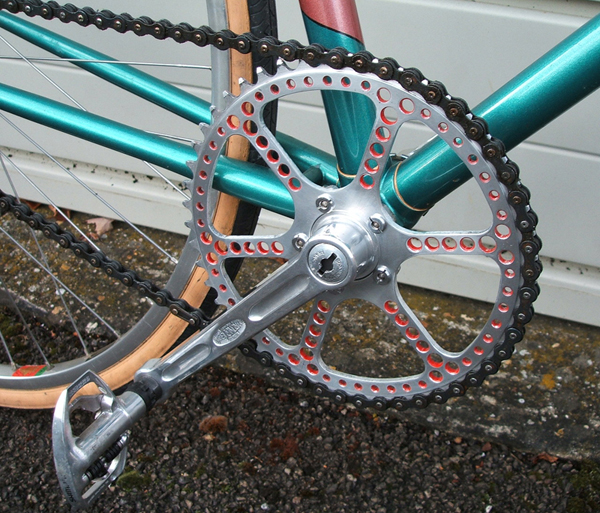
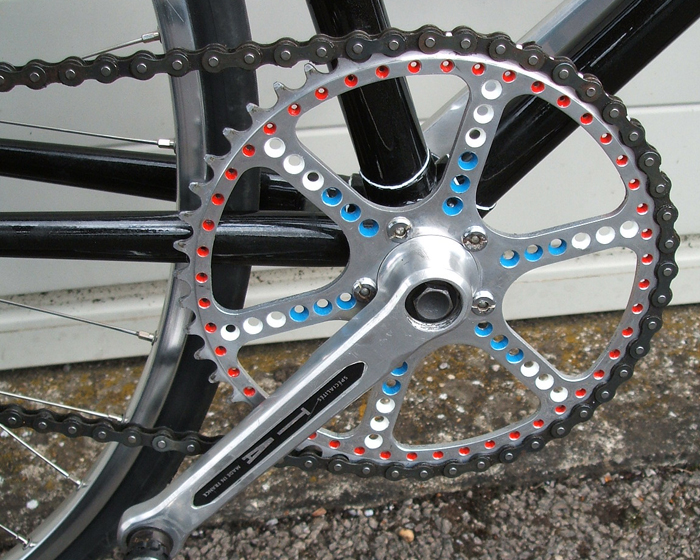
As to the holes in the chainring circumference: I use some form of fixturing to determine the diameter of the chainring. I then move the chainring around the center so many degrees and then drill a hole, but because the components are not necessarily machined on all surfaces, holes may have to be moved to get it visually correct; this is what we call “eye sweet.”
The history of drillium as I know it, having done pieces this way in the ’70s when it first became popular, the emphasis was on reducing weight. Everyone pretty much did it by eye/ hand. People like Eddie Merckx had a machinist re-work his parts so the hole patterns were basically true. “Filling in” holes with paint was not usually done on alloy pieces, however, when you drilled a steel part, such as the front derailleur arm, paint was sometimes used to protect the raw steel from rust. As the drilling caught on, component manufacturers started drilling their parts out, which then took it to the next level of accuracy. Shortly thereafter manufacturers started to incorporate lighter designs with more alloy parts including titanium, a good example of this would be the Campagnolo Super Record groupset. In the mid-’80s frame manufacturers started to panography their name in various parts, such as chainrings, handlebar stems, etc. Colnago was famous for doing this. Often times his name and his cloverleaf trademark were filled with paint, which, when people do the drilling and milling today, carry the paint filled idea forward, producing rather attractive pieces if not overdone.
In regards to finish, in the early days of drillium anodizing was removed and the pieces buffed bright.
I became aware of what is now termed “drillium” through an article in Bike World Magazine and the few copies of International Cycling I could find here in the States showing the bikes of Eddy Merckx, Alf Engers, etc. I applied these ideas to my 1974 Condor below.
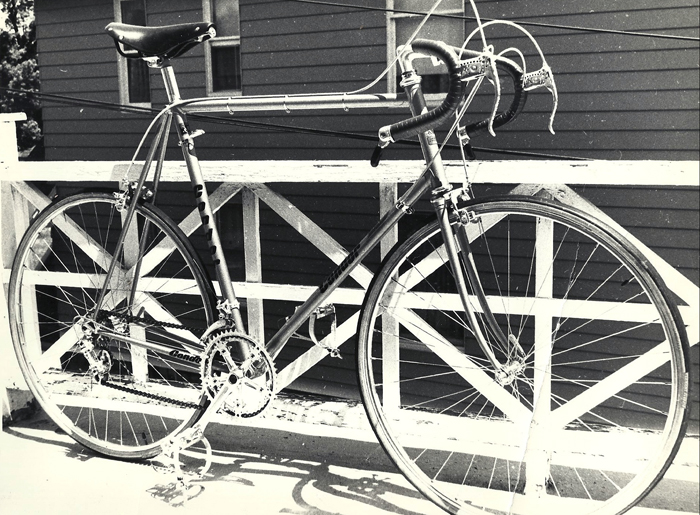
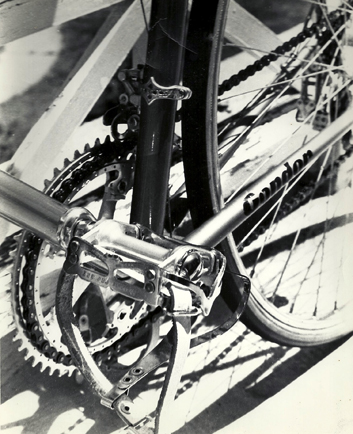
The original purpose was to remove as much weight as one dared (think: a race car approach, not the high art we see today – just a means to go faster through weight reduction). There were no plans to go by, instead you had to study each part and try to decide where to remove material. There is no right or wrong way, if you are happy with the results (both structurally and cosmetically). If you are trying to achieve historical accuracy for a restoration, there are many original photos available on the web, including this site. As an example, Alf Engers’ bikes were perhaps the boldest, and weight reduction was done by drilling large holes.
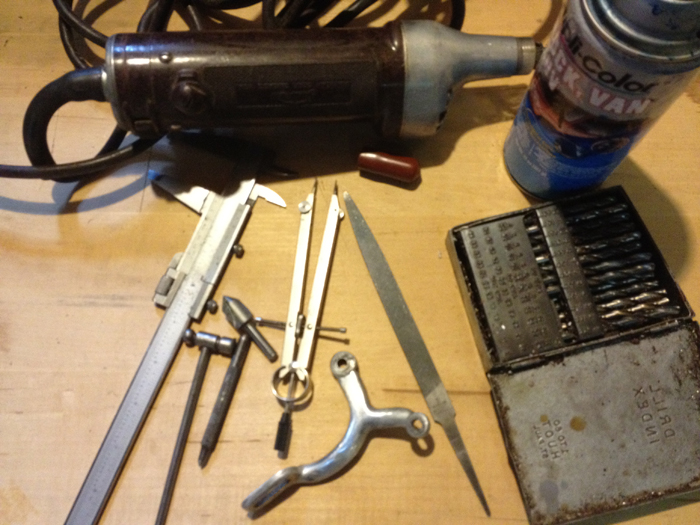
To slot components required a vertical milling machine, which was not readily available to most amateur riders. A Dremel tool was (and is) used for this type of work. Unfortunately, I don’t think a 220v model is available, so a voltage reducer would be required. Other tools required are: centerpunch, small toolmaker’s hammer, pin vice, a set of numbered drills, countersink, dividers, calipers, drill motor, layout dye, and assorted files, sandpaper, etc. If you are unsure of your ability to produce an accurate pattern, variations will be less noticeable with small holes spaced farther apart. Some parts may need to be cleaned of casting flash, stamping marks, etc. with files before starting.
Basic machining practices are employed:
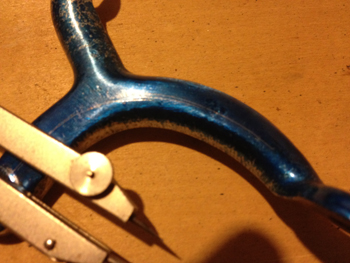
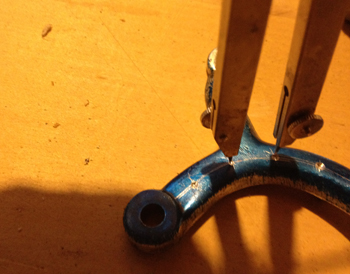
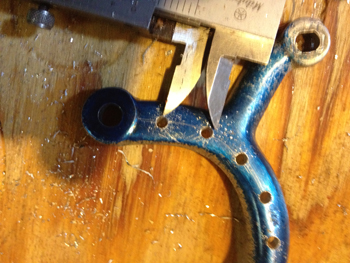
1. Blue the part with layout dye (spray lacquer can be substituted)
2. Scribe line where the holes are to be drilled along the length of the part, and the second set of lines intersecting at the spacing of the holes
3. Where the lines intersect, centerpunch a mark
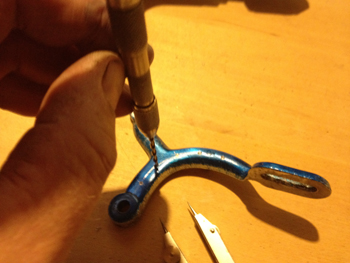
4. Use a pin vice to start a hole
5. Using dividers, check spacing (if in need of correction, the pin vice can be angled in the direction the hole needs to move)
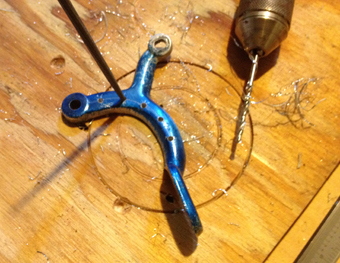
6. Drill starter hole smaller than the final size
7. Using calipers, check accuracy of hole spacing (correct if necessary, with a round file)
8. Drill the hole to its final size
9. Countersink
10. You can sand the parts and polish, and fill holes with paint if desired
If, like me (PU), you find this just too daunting you may be able to persuade Stuart to commission a job for you.
Posted: Sunday 16th August 2020
Upcoming Events
Whether you are looking for a gentle social meet up, or a 100-mile ride browse the community’s upcoming events and plan your next weekend outing.